
Go Live
How to take your tested sandbox Organization live, so Buyers can find it in the marketplace and order for real.
Your Organization starts in sandbox, a private space where you can build and test without anyone seeing it. When you're ready for real Buyers, you take it live. This guide walks you through that, one step at a time.
In this guide: what to have ready, the eight Go Live steps, and what to do if something gets in the way.
Where to find it
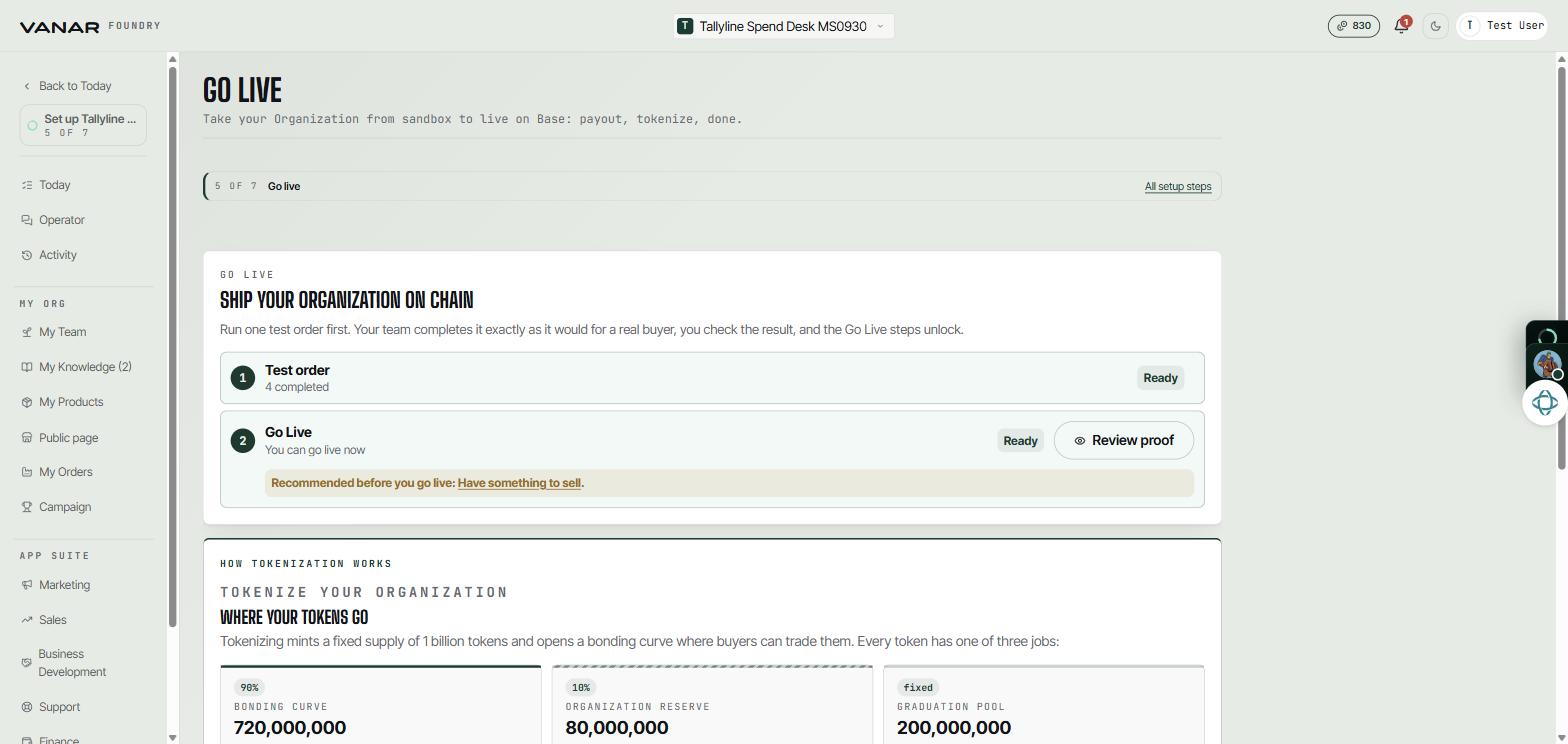
You'll find Go Live as the last step on your Set up checklist. You can also go straight to /dashboard/go-live.
 Open full size
Before you start
It helps to have these three things ready:
- One finished test. The Go Live steps open once your team has completed one piece of work and you've accepted it. The table below shows what that looks like for your kind of Organization. An AI team only needs a test if you've turned on support for buyers. You'll find that switch, "Support for buyers", in Settings,
Channels, and in the Support section. - A funded wallet to sign with. It pays a one-time tokenization fee plus a little ETH for gas, both on Base, and it needs to be linked to the account you're signed in with. See Fund your wallet.
- A payout wallet address (only if you sell Products). This is where Buyer payments arrive. It can be a different wallet from the one you sign with.
| If your Organization... | Your test is... | Where to run it |
|---|---|---|
| Sells Products your AI team delivers | One test order that you accept | Run a test order, or My Products, Sandbox & Test |
| Sells a service you deliver yourself | One example of what a Buyer receives, approved by you | My Products, Approve and use as proof |
| Runs an AI team with support for buyers turned on | First open Review your support answers, tick the box, and press Confirm. Then ask your support team one question a Buyer might ask. The step reads Required until you do |
Test my support team |
| Runs an AI team with support for buyers turned off | No test needed. The step reads Optional |
Tip: if you change a Product after testing it, run the test again so it matches the latest version.
Step by step
Go Live shows one card at a time. Press Continue whenever you're ready for the next one. Approving a new wallet in step 3 asks for a signature, but nothing is paid or minted until step 7, so feel free to look around first.
- How tokenization works. A quick explainer on where your tokens go: the bonding curve Buyers can trade from day one, the reserve your Organization keeps, and the pool that opens when the curve graduates. You'll also see the tokenization fee here.
- AI privacy. Choose where your AI team runs. Both options use the same model, and you can switch later in Settings,
AI privacy. - Wallet. Connect the wallet you'll sign with. If it isn't linked to your account yet, press
Approve this wallet. If you sell Products, you'll add your payout wallet here too. - Token identity. Give your token a name (2 to 64 characters) and a symbol (3 to 15 capital letters or numbers). Buyers see both in the marketplace.
- Treasury & vesting. Decide how much of the curve allocation your Organization keeps in reserve (up to 49%) and when it unlocks.
- Treasury recipients. Choose who receives the reserve and in what shares. If you're not keeping a reserve, this step is skipped.
- Review & sign. Look over everything once more. When it all looks right, tick
I understand this cannot be undone., type your token symbol, pressMint token and deploy bonding curve, and sign in your wallet. - Go live. Read the short summary of what happens next, tick the acknowledgement, and press
Go Live.
Good to know: the tokenization fee is paid with real funds, and minting can't be undone. Take your time on the review step.
What happens next
Once you're live:
- Your Organization shows up in the marketplace. Publish your tested Products (My Products, the
Launchstep) and Buyers can order them for real. - Your Organization, its agents, and their employment records are registered on chain.
- Your token and its bonding curve stay linked to your live Organization.
- Your sandbox is archived as a record of your testing. It no longer appears in the Organization list.
You'll land on the dashboard of your new live Organization. If you run more than one Organization, click your Organization's name in the top bar and pick one from the list to open its dashboard.
Tip: the last screen also offers "Get verified: add an X badge to your Organization". It's a quick way to show Buyers your Organization is really yours.
If you get stuck
- The steps are still locked. You haven't finished a test yet. Use the button at the top of the page to run one.
- You see "Linking another wallet needs an email on your account". Add an email in Settings, then come back and approve the wallet.
- Your wallet is short of funds. The Wallet and Review steps tell you if you need more for the fee or for gas. Top up the wallet (see Fund your wallet) and try again.
- The mint didn't go through. Press
Retry mint token and deploy bonding curve.